Hide a Button in Angular | 6 Simple Ways
In this article, we’ll see six ways to hide a button in Angular. We will create a simple to-do list app with only one component(App Component). It will contain an input element and a hidden button. The button will be shown if the user types an item in the input field. When the user clicks it, we’ll “print” the entered information as a list on the browser screen.
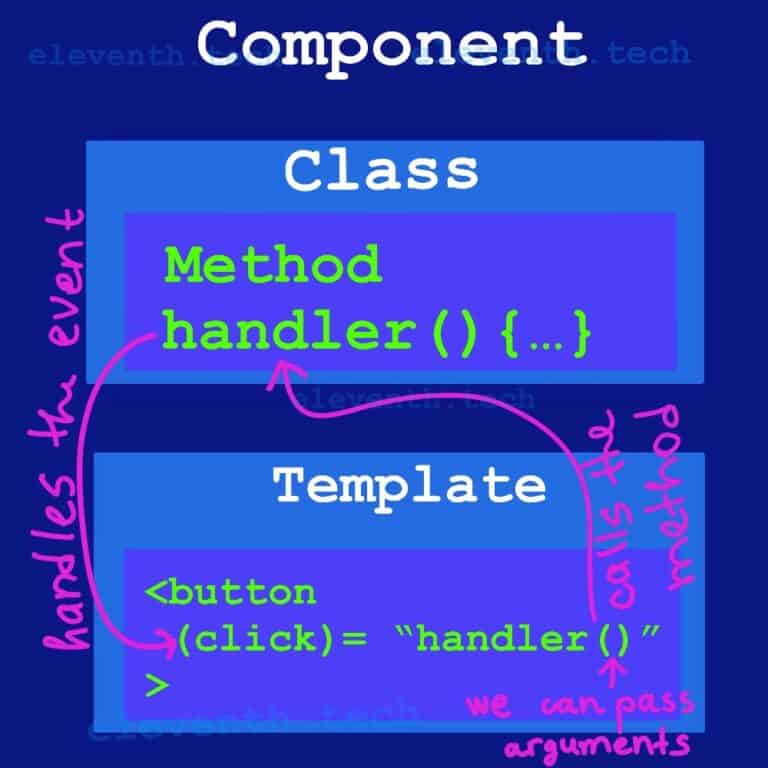
Therefore, the App Component will collect all entered options in an array. So we need to handle the click event in the App Component using Event Binding. Take a look at the previous article to read further about implementing a button click in Angular.
The video below shows how the application should work:
Prerequisites
Create the app
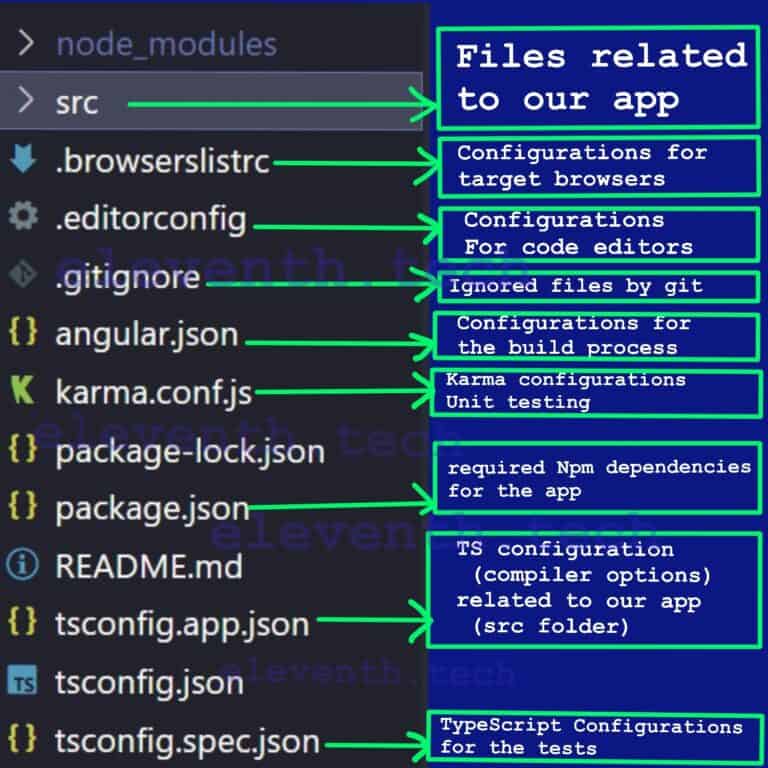
Create an app using the Angular CLI command – ng new hide-button. Angular will create a component with 4 files – Delete app.component.spec.ts and app.component.css because we don’t need them.
Add two properties in app.component.ts
Add a property: tasks = [‘organize wardrobe’, ‘buy eggs’]. We’ll initialize it with some dummy data in order to test later whether the array is shown on the screen.
Add a field: inputValue = ”. We’ll use it to check whether the HTML input element is empty. If it is empty, the button will be hidden. Otherwise, we’ll show it.
//Code.....here.....
// here we'll keep each user's input
  tasks = ['organize wardrobe', 'buy eggs'];

// here  we'll keep the current user's input
// if it's empty we'll hide the button
  inputValue = '';
//Code.....here.....
Add two methods in app.component.ts
Create a method: onKey(value: string). It will handle the keyup event. We want to know whether the user has entered a value in the input element, that’s why we should listen to the keyup event and when it occurs to keep the data in the input value property.
Create a method: onAddTask(). The button will appear if the HTML element isn’t empty. So when the user clicks it, we’ll call onAddTask() and add inputValue to the tasks array.
//Code .... here....

// this is the handler for the keyup event,
// here we'll assign the user's input to the property
// in order keep it later in the array
  onKey(value: string) {
   this.inputValue = value;
  }

  onAddTask() {
// we will keep the input value in the array to show it later on the screen
    this.tasks.push(this.inputValue);
// here we reset the value
    this.inputValue = '';
  }

//Code .... here....
The app.component.ts should look like the below snippet:
import { Component } from '@angular/core';

@Component({
  selector: 'app-root',
  templateUrl: './app.component.html',
  styleUrls: ['./app.component.css']
})
export class AppComponent {

// here we'll keep each user's input
  tasks = ['organize wardrobe', 'buy eggs'];

// here  we'll keep the current user's input
// if it's empty we'll hide the button
  inputValue = '';

// this is the handler for the keyup event,
// here we'll assign the user's input to the property
// in order keep it later in the array
  onKey(value: string) {
   this.inputValue = value;
  }

  onAddTask() {
// we will keep the input value in the array to show it later on the screen
    this.tasks.push(this.inputValue);
// here we reset the value
    this.inputValue = '';
  }

}
Add the HTML input element in the template
<label for="chore-input">Add a task:</label>
<input type="text" id="chore-input" (keyup)="onKey(newTask.value)" [value]="inputValue" #newTask>
Here we’re attaching the keyup event to the input element – Angular will call the method when it occurs. We need to update the value of the HTML input element when we reset inputValue in the onAddTask method, that’s why we’re setting [value] (DOM property) to be equal to inputValue. So if the user clicks the button, the input element will be reset. We pass to the onKey method a template variable #newTask, so we can get the entered value of the user.
Add the button in the template
<button type="button" (click)="onAddTask()">Add task</button> We’ll hide the button later. Here we’re listening for the click event and attaching to it the onAddTask method.
Loop through the tasks property in the template to show it
<hr>

<h2>To-Do List</h2>
<ul>
  <li *ngFor="let task of tasks">{{task}}</li>
</ul>
We’re using *ngFor to loop through the tasks array.
The app.component.html should look like this:
<h1> To-Do App</h1>
<h2>Enter a task</h2>
<label for="chore-input">Add a task:</label>
<input type="text" id="chore-input" (keyup)="onKey(newTask.value)" [value]="inputValue" #newTask>
<p>{{inputValue}}</p>
<button type="button" (click)="onAddTask()">Add task</button>
<hr>
<h2>To-Do List</h2>
<ul>
<li *ngFor="let task of tasks">{{task}}</li>
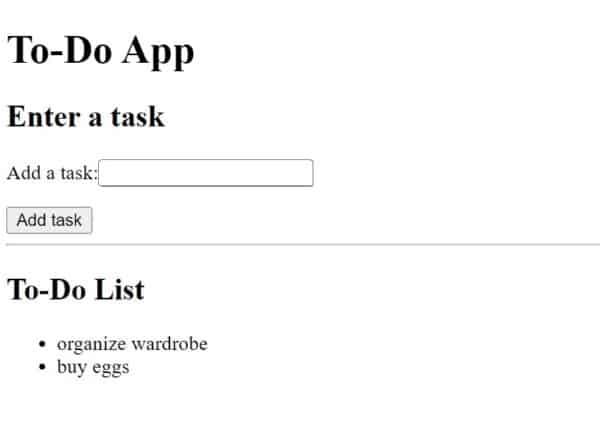
</ul>When you serve the app, you should see the same thing:
1. Use the *ngIf structure directive to hide an element in Angular
The first way to hide a button in Angular is to use the *ngIf structure directive. I like it because the code looks tidy and simple. Change the button element in the HTML template:
<h1> To-Do App</h1>

<h2>Enter a task</h2>

<label for="chore-input">Add a task:</label>
<input type="text" id="chore-input" (keyup)="onKey(newTask.value)" [value]="inputValue" #newTask>
<p>{{inputValue}}</p>

<button *ngIf="inputValue" type="button" (click)="onAddTask()">Add task</button>

<h2>To-Do List</h2>
<ul>
  <li *ngFor="let task of tasks">{{task}}</li>
</ul>
The expression “inputValue” will coerce to a boolean value. When the expression evaluates to true, Angular renders the element. We know that an empty string coerces to false, that’s why when the inputValue is empty, the button is hidden.
2. Use [ngStyle] with the visibility property to hide an element in Angular
We can use the ngStyle attribute directive that updates styles for the containing HTML element. We can set the visibility property dynamically using the ternary operator. inputValue? will coerce to Boolean, so when it is empty, we’re setting the visibility property to ‘hidden’. Otherwise, it will be ‘visible’.
<!-- Code... here... -->

<button [ngStyle]="{ 'visibility':  inputValue ? 'visible': 'hidden'}" type="button" (click)="onAddTask()">Add task</button>

<!-- Code... here... -->
3. Use [ngStyle] with the display property to hide a button in Angular
We can use ngStyle with the display property to hide a button in Angular. We can set it dynamically using the ternary operator. inputValue? will coerce to Boolean, so when it is empty, we’re setting the display property to ‘none’. Otherwise, it will be ‘block’.
<!-- Code... here... -->

<button [ngStyle]="{ 'display':  inputValue ? 'block': 'none'}" type="button" (click)="onAddTask()">Add task</button>

<!-- Code... here... -->4. Use the hidden DOM property to hide a button in Angular
We can use [hidden] to hide a button in Angular. If the expression evaluates to true, the button is hidden. If not, it will be shown. Therefore, we need ! before inputValue.
<!-- Code... here... -->
<button [hidden]="!inputValue" type="button" (click)="onAddTask()">Add task</button>
<!-- Code... here... -->5. Use style binding display: none to hide a button in Angular
The other way to hide a button in Angular is by using [style.display] with ‘block’ or ‘none’.
<button [style.display]="inputValue ? 'block': 'none'" type="button" (click)="onAddTask()">Add task</button>6. Use style binding [style.visibility] to hide a button in Angular
We can set [style.visibility] using the ternary operator. inputValue? will coerce to true or false, so when it is empty, we’re setting [style.visibility] to ‘hidden’. Otherwise, it will be ‘visible’.
<button [style.visibility]="inputValue ? 'visible': 'hidden'" type="button" (click)="onAddTask()">Add task</button>Summary
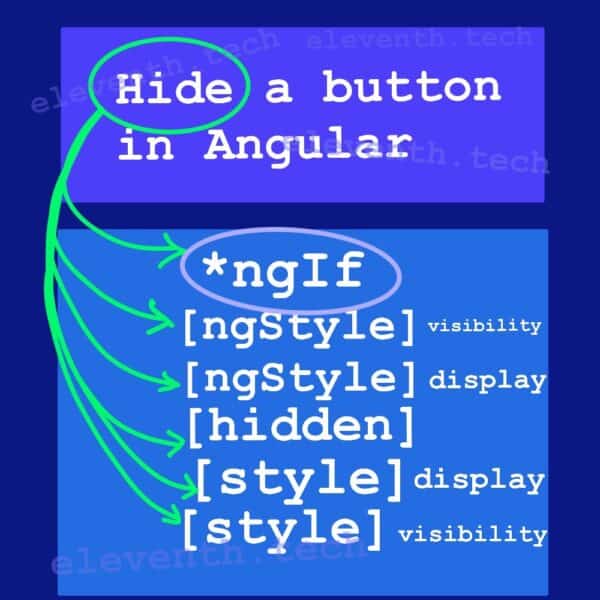
We’ve learned that we can use *ngIf, ngStyle, style.visibility, style.display, and hidden to hide a button in Angular.